7 min to read
Sitecore JSS: Authentication

Building a website at some point always requires some mechanism for a user to be able to login. And because we are working in a headless enviroment we have to check if we can accomplish this.
 JSS Authentication Recipe
Before we can actually log in we must have some some stuff in our JSS project. Most of the time we execute GET-requests and consume the data we receive from the server. Now we have to add user interaction and also post data to the server.
I want to have some state in my app and that means that I have to add react-redux and for my controls I want to use material design so I also add material-ui to my package.json. This allows me to create a page with a login interface.

Next we have to make sure our login component will work with our app. The app also has to work with our Redux store. This means that we need to wrap the ApolloProvider in the Redux Provider. Dont forget to import Provider and Store: import { Provider } from 'react-redux'; import { store } from './helpers';
    const AppRoot = ({ path, Router, graphQLClient }) => {
      const routeRenderFunction = (props) => <RouteHandler route={props} />;
      return (
        <Provider store={store}>
          <ApolloProvider client={graphQLClient}>
            <SitecoreContext componentFactory={componentFactory} contextFactory={SitecoreContextFactory}>
              <Router location={path} context=>
                <Switch>
                  {routePatterns.map((routePattern) => (
                    <Route key={routePattern} path={routePattern} render={routeRenderFunction} />
                  ))}
                </Switch>
              </Router>
            </SitecoreContext>
          </ApolloProvider>
        </Provider>
      );
    };

    export default AppRoot;
So adding some actions, services, a reducer and a store should work, right?? Wrong!!!!
 Bending the rules
As the SSC Auth service does not support an
OPTIONSpreflight CORS request out of the box (resulting in a404response), you will also have to ensure your Sitecore instance responds to the preflight request and returns a200response (with the configured headers).
 The CORS hell
And I don’t mean those hot Irish girls!

So what’s going on here? It turns out that SSC out of the box does not allow CORS preflight requests. So what is this preflight thingy? Only simple requests are allowed directly to a server: GET, HEAD and POST. And posting is only allowed with the current content type headers: application/x-www-form-urlencoded, multipart/form-data or text/plain. Now let’s analyse the call to the SSC API. The payload that we have to send to the service has to be JSON, application/json. And this is why the browser sends an OPTIONS request to the server.
In web.config the verb OPTIONS is disabled so make sure you have it enabled:
        <security>
          <requestFiltering>
            <requestLimits maxAllowedContentLength="524288000" />
            <verbs allowUnlisted="true">
              <add verb="OPTIONS" allowed="true" />
              <add verb="PUT" allowed="false" />
              <add verb="DELETE" allowed="false" />
              <add verb="DEBUG" allowed="false" />
            </verbs>
          </requestFiltering>
        </security>
After making a request we still have an isue:

In the early days we could change the global.asax and just add some lines of code to make it work. Nowadays that is not going to help us. We now have to create a pipeline that will support the OPTIONS verb by returning a 200 OK status. For this you can use a PreprocessRequestProcessor. The pipeline must execute as soon as possible and preferably be patched as the first processor.
PreProcess Request and Configuration:
    using Sitecore.Pipelines.PreprocessRequest;
    using System;
    using System.Linq;

    namespace Macaw.JSS.Examples
    {
        public class CorsOptions : PreprocessRequestProcessor
        {
            public override void Process(PreprocessRequestArgs args)
            {
                var request = args.HttpContext.Request;
                var response = args.HttpContext.Response;
                if (request.Headers.AllKeys.Contains("Origin", StringComparer.InvariantCultureIgnoreCase) &&
                    request.RawUrl.StartsWith("/sitecore/api/ssc/auth")
                    )
                {
                    if(request.HttpMethod == "OPTIONS")
                    {
                        response.AddHeader("X-Fabricated-By-Gary", "That's cool");
                        response.AddHeader("Access-Control-Allow-Origin", "*");
                        response.Flush();
                    }
                    if(request.HttpMethod == "POST")
                    {
                        response.AddHeader("Access-Control-Allow-Origin", "*");
                    }
                }
            }
        }
    }
<configuration xmlns:patch="http://www.sitecore.net/xmlconfig/">
<sitecore>
<pipelines>
<preprocessRequest>
<processor type="Macaw.JSS.Examples.CorsOptions, Macaw.JSS.Examples"
patch:before="*[@type='Sitecore.Pipelines.PreprocessRequest.NormalizeRawUrl, Sitecore.Kernel']">
</processor>
</preprocessRequest>
</pipelines>
</sitecore>
</configuration>Make sure to also add the headers for Access-Control-Allow-Headers, Access-Control-Allow-Methods and Access-Control-Allow-Origin. But only the first two can be defined in the web.config. Why?
        <httpProtocol>
          <customHeaders>
            <remove name="X-Powered-By" />
    		<add name="Access-Control-Allow-Headers" value="origin, content-type, accept" />
    		<add name="Access-Control-Allow-Methods" value="*" />
          </customHeaders>
        </httpProtocol>
The JSS API by default will send the Access-Control-Allow-Origin header. Defining it also in the web.config will have JSS send it twice. Browsers don’t like it when a header is sent twice and it will break your app. The result is: Page Not Found. Ouch!
Do not define the
Access-Control-Allow-Originheader in the web.config as JSS will send the header twice and break your code
SSC on the other hand also needs the Access-Control-Allow-Origin in place. If not the OPTIONS preflight will fail. This is why the headers are added in the PreprocessRequestProcessor.
 Add SSL binding to IIS
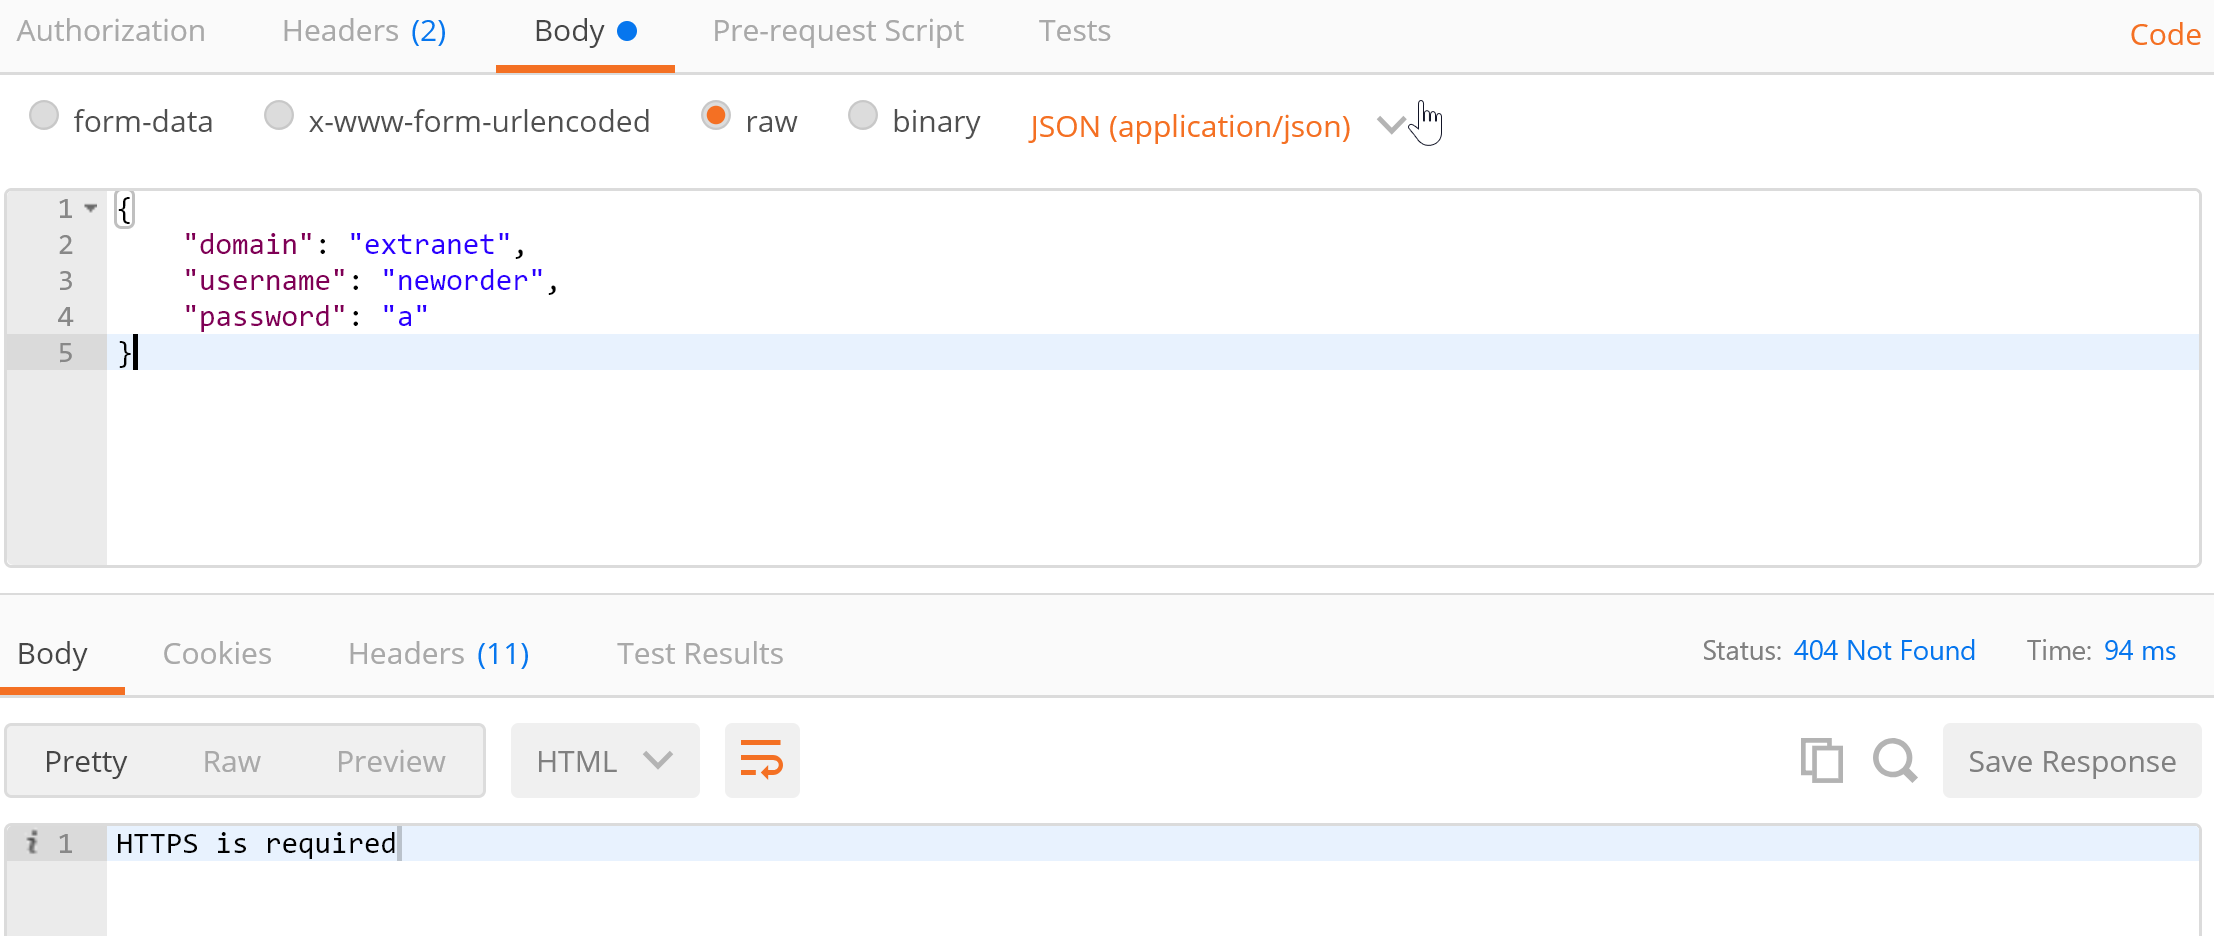
When posting our login to the SSC we get a 404 telling us the post has to be over HTTPS:

We must assign an SLL binding to our website. Get the script I have here: https://pastebin.com/A9CUz1rH. This script will automatically create your certificate, installs it and bind it to your website.
The following params are needed:
- dnsName - a name you want to give to your certificate (can be anything you want for localhost)
- siteName - the website to apply the bindings/cert to (top level, not an application underneath!)
- fqdn - fully qualified domain name (empty for ‘All unassigned’, or e.g ‘contoso.com’)
If you already have an SSL binding in place, please make sure you remove it otherwise the binding will fail. In Firefox make sure to create the exception for your self-signed certificate.
Now this all has been completed I’ll hit the login button and we get nice responses:


Comments