6 min to read
How to work with Git: Left Git or right Git?

I know this post hasn't to do anything with Sitecore but also with Sitecore development we want to make sure our sourcecode is protected in some repository. In my past live I had to use Microsoft's source repository VSS to store my code and collaborate with my fellow colleagues. Even with VSTS this was still the way to go. And then it all changed when VSTS had the option to use it as a Git repository. All open source developers probably will laugh in my face right now but for me it was the first time I actually had fun with working in git. The old way I didn't find very flexible.
This post is for you when you start with Git, or when you want to know how to choose between Merge or Rebase. I also cover the apps you can use and the commands from the git command-line. If you know this, read no further cuz it's TL;DR ;-)

 Starting with Git
The difference between Git and the old-fashioned way woring with VSTS is that VSTS relies that your changes are added onto the changes of others. Before checking in your code you need to keep the code in sync. If you don't you'll find yourself spending a lot of time resolving code conflicts.
Git works in a different way. In Git you will need to use a so called feature branch. What happens under the hood is that the entire code base is put into your feature folder. While developing and you are the sole one working on the feature you're the only one committing to this branch. This means if you want to merge your code with the actual develop branch you need to check for differences. When working with more people on a feature branch code conficts may occur more often. Then you need to communicate with your colleagues, ohboy! :-)
Setting up Git on your machine is extremely easy. Just download the installer and run it (next next next etc).
 Choosing your Git tooling
So there's a lot of tooling available and thanks to the community and vendors you can choose between a lot of apps.

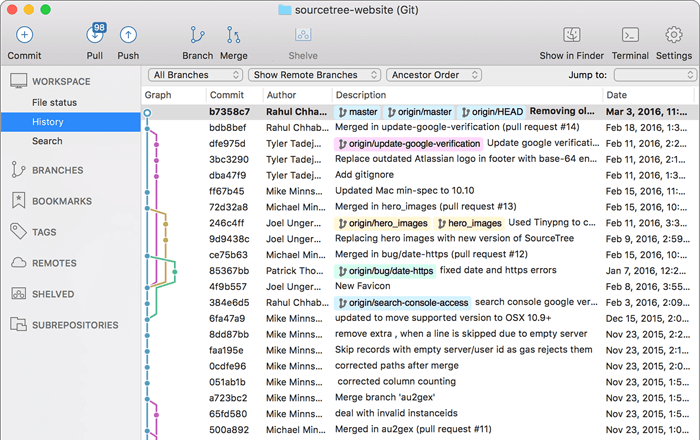
 SourceTree
This was the first app to work with. It has a nice interface and is built on top of a bunch of open source tooling. A great feature is having the option to push after a commit with a comment. What I don't like that much is that I have to swith to a different branch when I want to pull the latest changes.

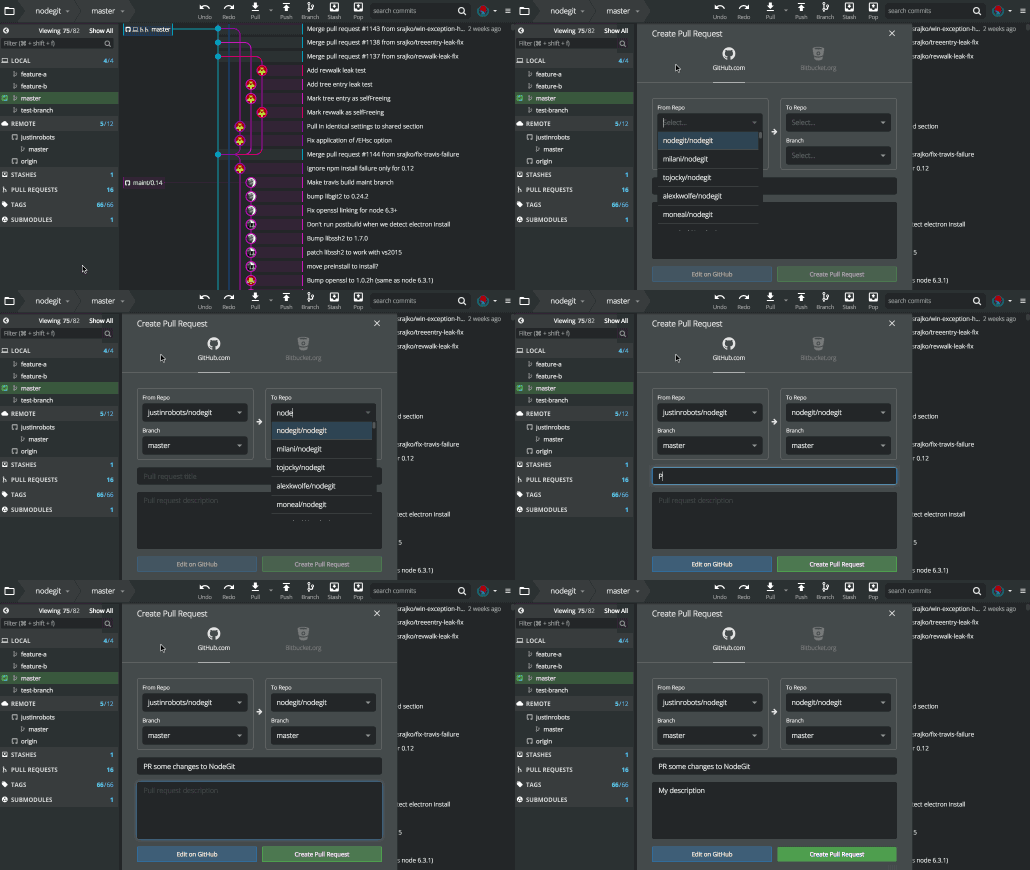
 GitKraken
This is what I find very strong within GitKraken. Pulling a different branch while working in a different branch. The graph has a nice overview and also staging, stashing and popping is extremely easy. Initiating Git Flow is a little stashed away in the settings configuration of the app.

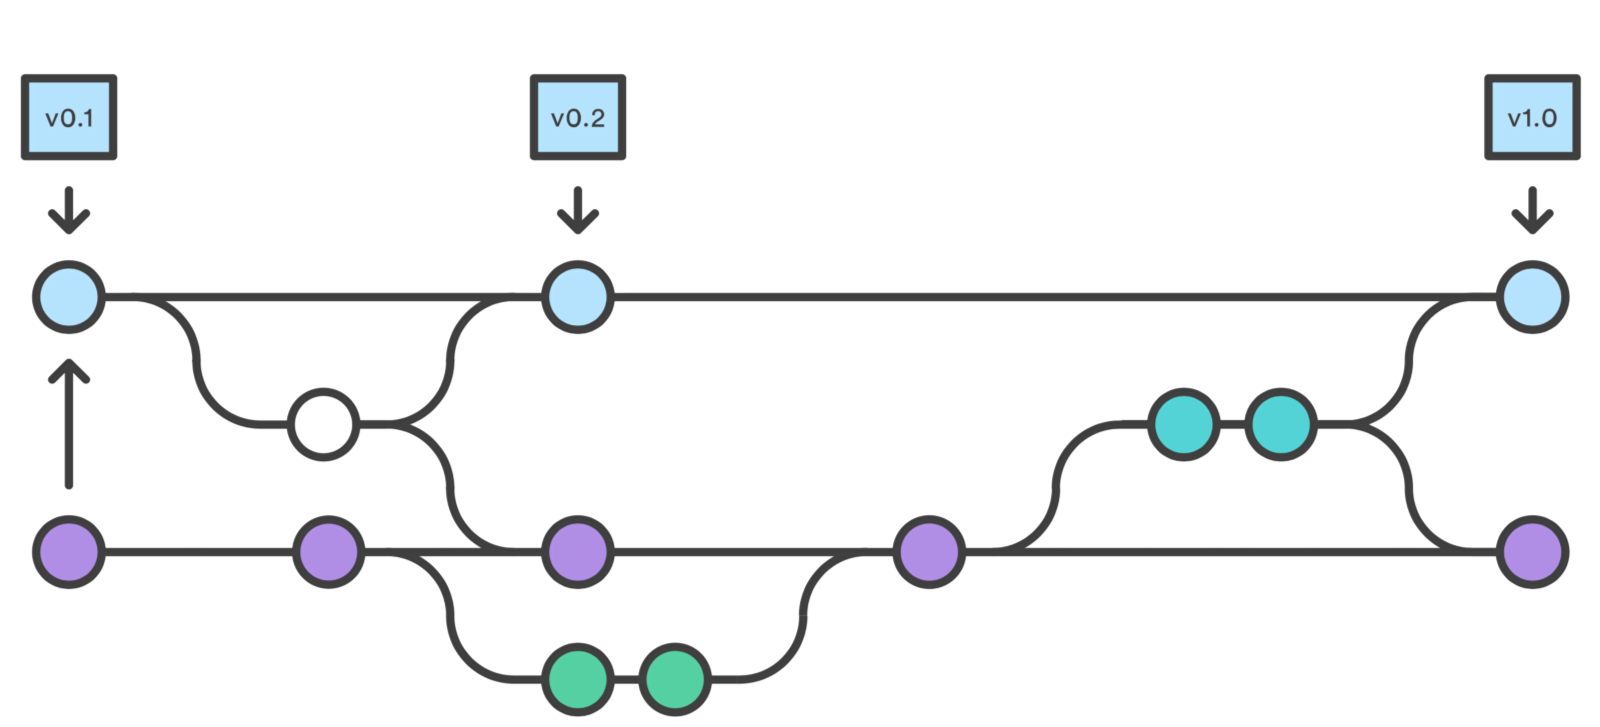
Gitflow Workflow is a Git workflow design that was first published and made popular by Vincent Driessen at nvie. The Gitflow Workflow defines a strict branching model designed around the project release. This provides a robust framework for managing larger projects.
 Creating feature branches
- Get your local repository up to date with TFS git fetch origin
- Switch to the develop branch git checkout develop
- Pull in the latest commits git pull
- Create a new branch git checkout -b feature/my-awesome-feature
- Set the upstream so the branch can be tracked on TFS git push --set-upstream origin feature/my-awesome-feature
 Git console
Honestly I still use GitKraken for doing commits but with the integration with Visual Studio Code this has become obsolete. I just use it to see the flow. Make sure to add the number of your PBI or task ID e.g. #26543 this will associate that item to your commit. When creating the pull request and the VSTS-template forces you to add the PBI association, you don't need to add it because it is there when you added the id in the commit. So make sure when squashing that your id does not get omitted.
 Merge
Merge
So before creating a pull request we need to add our feature code to the code from the develop branch. And because wasn't familiar with Git strategies I merged my feature code into the develop branch. This is not a wrong thing to do but in the end the graph will not show a nice historical single line

 Pros
Pros
- Simple to use and understand.
- Maintains the original context of the source branch.
- Existing commits on the source branch are unchanged and remain valid.
 Cons
Cons
- When multiple people work on the same branch, the merges don’t serve any useful historic purpose and create clutter.
 Rebase
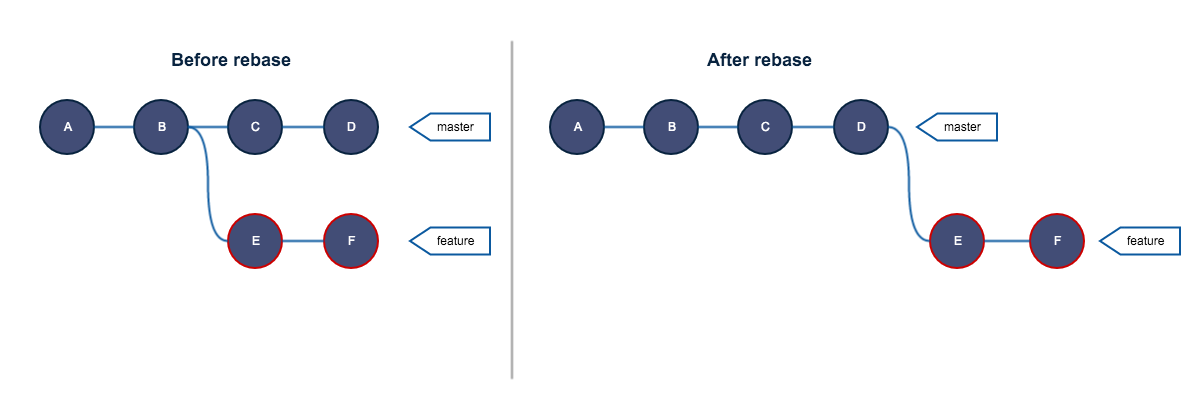
Rebase is a different story and requires some insights of how git works. Result of rebasing is that you can squash your commits into one and berge them back into the develop branch

 Pros
Pros
- Simplifies your history
- Clutter free branches and pull requests
 Cons
Cons
- Enable force push on VSTS. This may damage your Git repo and you should understand what you are doing!
- Slightly more complex. Each commit is rebased in order, and a conflict will interrupt the process of rebasing multiple commits
- Rewriting of history has a high impact on fellow developers.
 Console actions
When working with the Git command line we want to do the following things to Rebase
git status- check if you have no issues or even when you forgot to commit.git logorgit log --graph --oneline- show all the commitsgit rebase -i HEAD~2- rebase interactively so you can squash the commits. This allows you to merge your commits.git rebase develop- does the actual rebase onto the develop branch.git push -f- force push your changes.- Now you're done to create your pull request.
 Tips when doing a Rebase
- Squash before rebase, only keep handfull of commits
- Always keep refactorings and renames as separate commits
 Pitfalls when doing a Rebase

- Squash / rebase is a destructive action, which requires
git push –-force - Strongly advised to point the remote
originto your private fork - Never rebase master / develop / release branches
To set your editor to e.g. Notepad++ use the following commands: (x86)git config core.editor "'C:\Program Files (x86)\Notepad++\notepad++.exe' -multiInst -notabbar -nosession -noPlugin"or (x64)git config --global core.editor "'C:/Program Files/Notepad++/notepad++.exe' -multiInst -nosession". Setting it back to vmgit config --global core.editor vim

Comments